
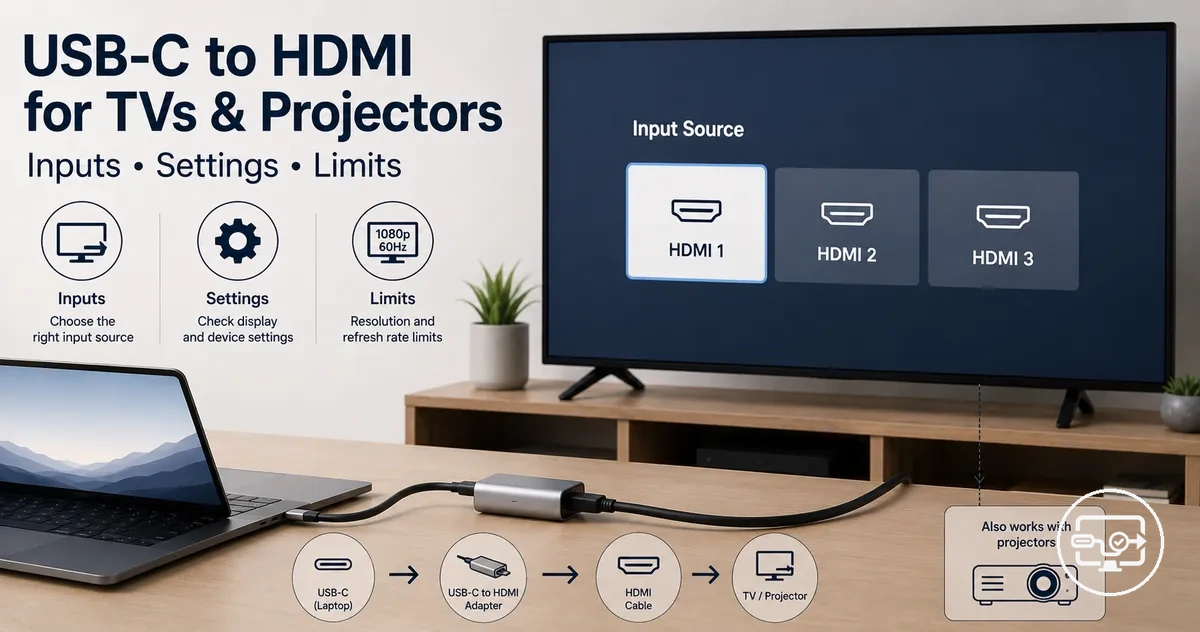
USB-C to HDMI Compatibility on TVs and Projectors
USB-C to HDMI compatibility on TVs and projectors depends on whether the source device supports video output over USB-C and whether the display accepts the signal format and handshake. A working connection requires both layers to align: the USB-C port typically needs to support DisplayPort Alt Mode or Thunderbolt, and the TV or projector needs to recognize the incoming resolution, HDR metadata, and HDCP handshake. The two deciding layers in the compatibility chain are source output and display acceptance.
A scenario where a USB-C to HDMI connection works on a monitor but fails on a TV or projector often points to a mismatch in one of these layers rather than a faulty adapter. For an overview of how USB-C to HDMI compatibility works across displays, see the USB-C to HDMI Compatibility hub. Before changing settings, it helps to define what 'compatible' means for your specific display and source combination.
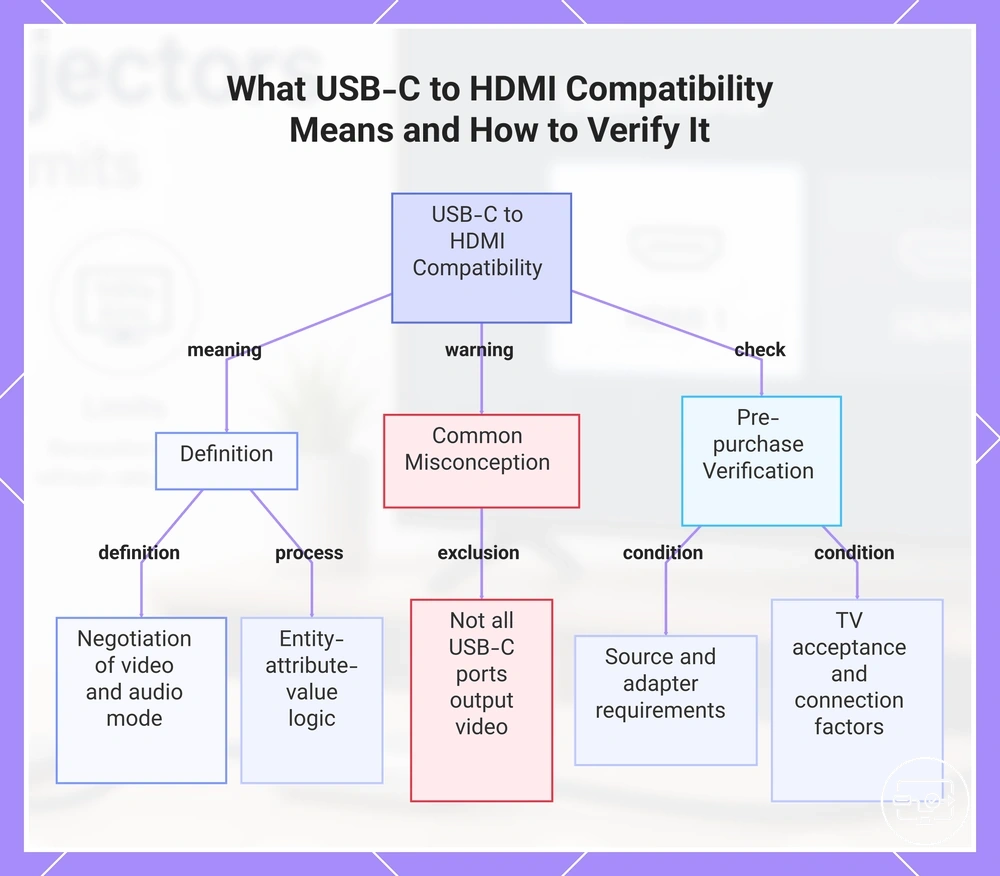
What “compatible” means for USB-C to HDMI with a TV or projector
USB-C to HDMI compatibility is the ability of a source device, the adapter chain (cable, adapter, or hub), and the TV or projector to negotiate and sustain a supported video and audio mode. This process follows an entity-attribute-value logic: the source device must have a USB-C port capable of video output via DisplayPort Alt Mode, the adapter chain must convert that signal to HDMI, and the TV or projector must accept the incoming resolution, refresh rate, and HDCP handshake, resulting in picture and sound on the display.
A common misconception is that any USB-C port can output video; in reality, many support only charging or data transfer. Video output requires the port to implement DisplayPort Alt Mode, which is not universal.
To assess whether a specific USB-C to HDMI setup can work with your TV or projector, verify the following conditions before making a purchase.
- The source device’s USB-C port must support video output (DisplayPort Alt Mode).
- The adapter or cable must support the required resolution (e.g., 4K at 60 Hz) and HDCP version.
- The TV or projector must accept the output resolution and refresh rate; mismatched settings can cause a black screen.
- The adapter chain must be fully seated and free of damage; loose connections often result in no signal.
Even when the TV or projector remains the same, the device class—such as a phone versus a laptop—can change the likelihood of successful compatibility. For more details, see our phone and tablet compatibility notes.
This chart explains the meaning of USB-C to HDMI compatibility, common misconceptions, and the key conditions to verify before purchasing.
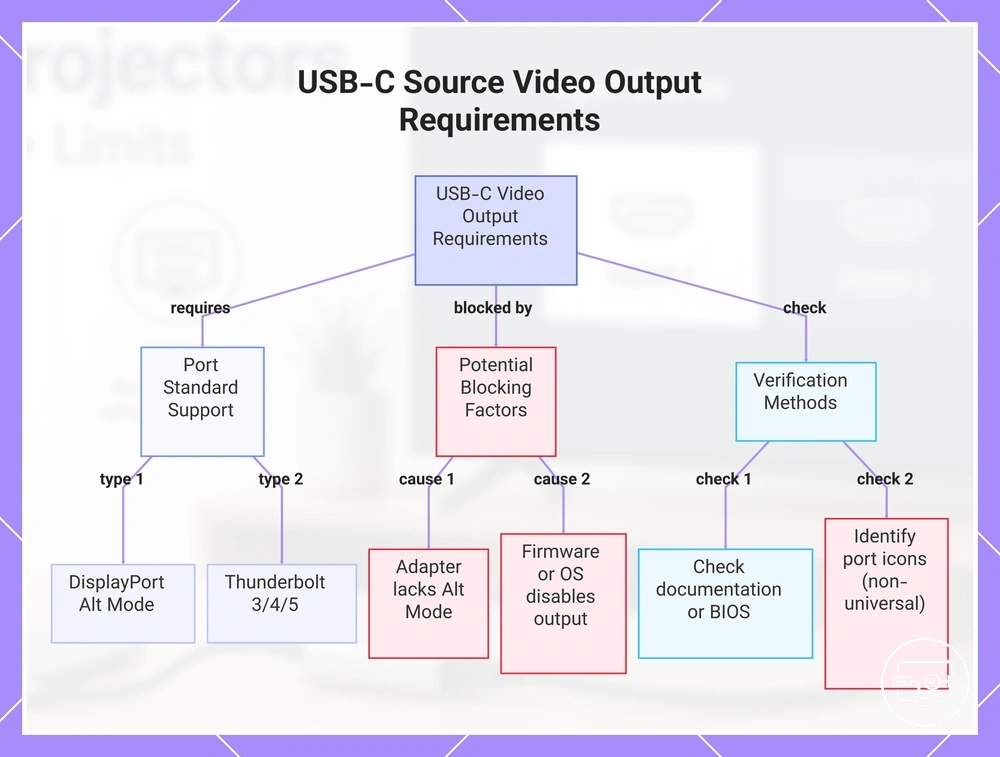
USB-C source requirements that decide whether video output is possible
Video output from a USB-C source typically requires the port to support DisplayPort Alt Mode or Thunderbolt.
- A USB-C port with DisplayPort Alt Mode support can output video because its high-speed lanes are repurposed to carry a DisplayPort signal.
- Thunderbolt 3/4/5 ports also typically support video output using DisplayPort tunneling, making them suitable for external displays.
- Even if the source port supports Alt Mode, video output can be blocked if the adapter does not also support it.
- Device firmware or OS policy may disable video output over USB-C, so checking the system's documentation or BIOS settings is advisable.
- Port labels such as a lightning bolt or DP icon can indicate video support, but these markings are not universal and may be missing on many devices.
This chart shows the key requirements for USB-C video output, common blockers, and methods to verify support.
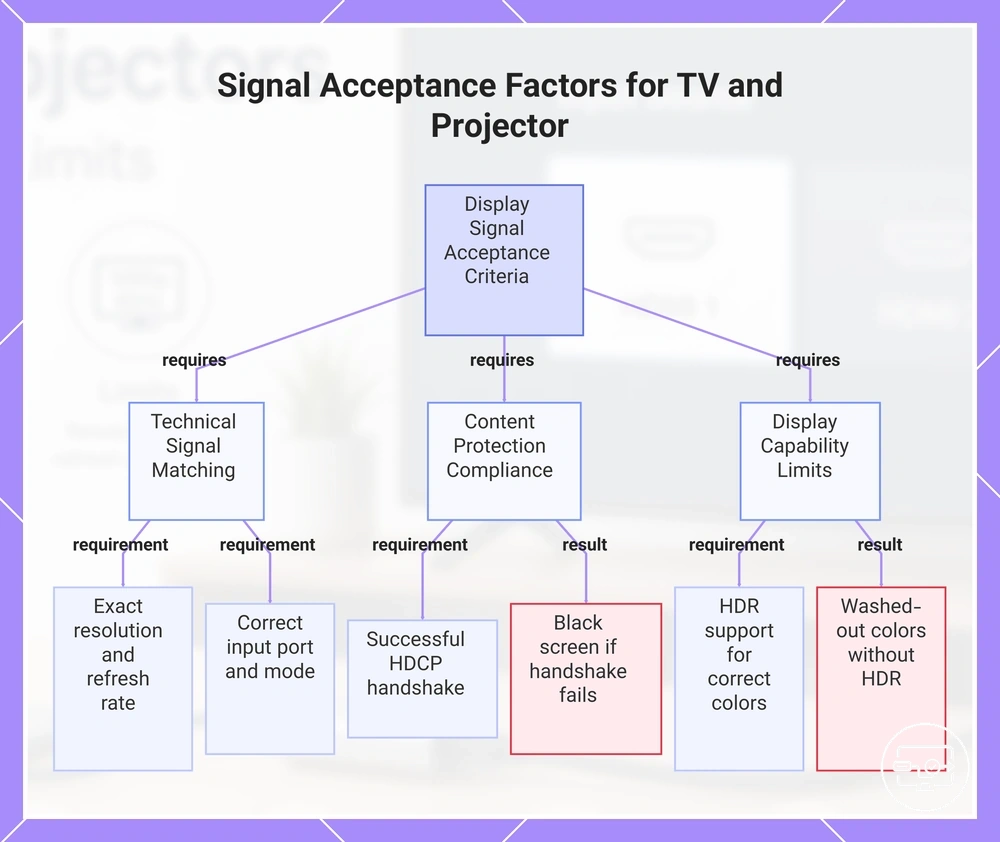
TV or Projector Acceptance Factors That Decide Whether the Signal Is Usable
A TV or projector shows a usable picture only when its input stage accepts the signal's resolution, timing, and content protection rules. If any acceptance condition is not met, the screen may stay black or display a degraded image.
The display must meet the following acceptance criteria to deliver a usable picture. However, “picture present” and “usable picture” are not always the same—a display may show a signal but with incorrect colors or reduced resolution due to HDR or format limitations.
- Supported resolution and timing: The display must accept the exact resolution and refresh rate sent by the source. If not, it may show no signal, scale the image poorly, or the source may downgrade the signal.
- HDCP compliance: Protected content typically requires a successful HDCP handshake. Without it, the display may show a black screen or an error message.
- Color and HDR support: Even if the picture appears, HDR content may not display correctly when the display lacks HDR capability, resulting in washed-out colors or a dim image.
- Input mode acceptance: The display input must be set to the correct port and mode that matches the source’s output signal. Otherwise, the projector may say “No Signal.”
This chart shows the main acceptance criteria a TV or projector must meet to display a usable picture, including resolution and timing, HDCP compliance, and display capability limits.
TV vs projector behavior that changes USB-C to HDMI outcomes
Whether a USB-C to HDMI connection works reliably often comes down to whether the display is a TV or a projector; the same chain can cause overscan on a TV and intermittent sync drops on a projector.
TVs typically apply processing and scaling, which can introduce overscan or aspect ratio issues. Projectors often place stricter demands on signal timing, making them more sensitive to sync inconsistencies.
The image contrasts these processing and sync differences, showing why the same USB-C to HDMI chain can cause overscan on TVs but sync drops on some projectors.
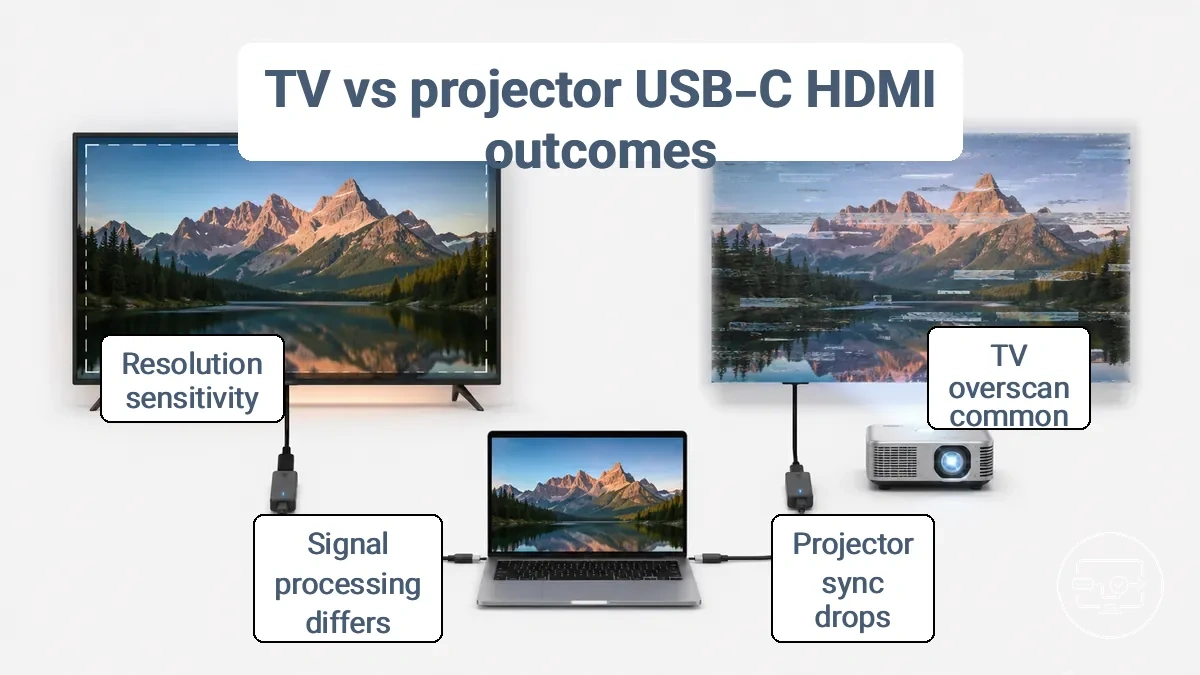
If you experience overscan or incorrect aspect ratio, check the TV side first. For a lost signal or flickering, the projector’s sync tolerance is often the cause.
| Aspect | TV (common behavior) | Projector (common behavior) |
|---|---|---|
| Signal processing | Applies scaling and picture enhancement; may introduce overscan | Minimal processing; often requires clean, timed signal |
| Overscan handling | Often crops edges by default; user may need to adjust overscan setting | Rarely crops; overscan more likely a source or cable issue |
| Resolution negotiation | Accepts a wide range of resolutions and scales to panel | Often requires native or exact-resolution input; mismatch can cause dropout |
| Sync tolerance | Higher tolerance for timing variations; recovers from signal gaps | Lower tolerance; intermittent sync drops more common |
| Input latency assumptions | Assumes processing delay is acceptable for video content | Often designed for low-latency presentation; signal interruptions more disruptive |
Scaling and picture handling differences that cause overscan, blur, or wrong aspect ratio
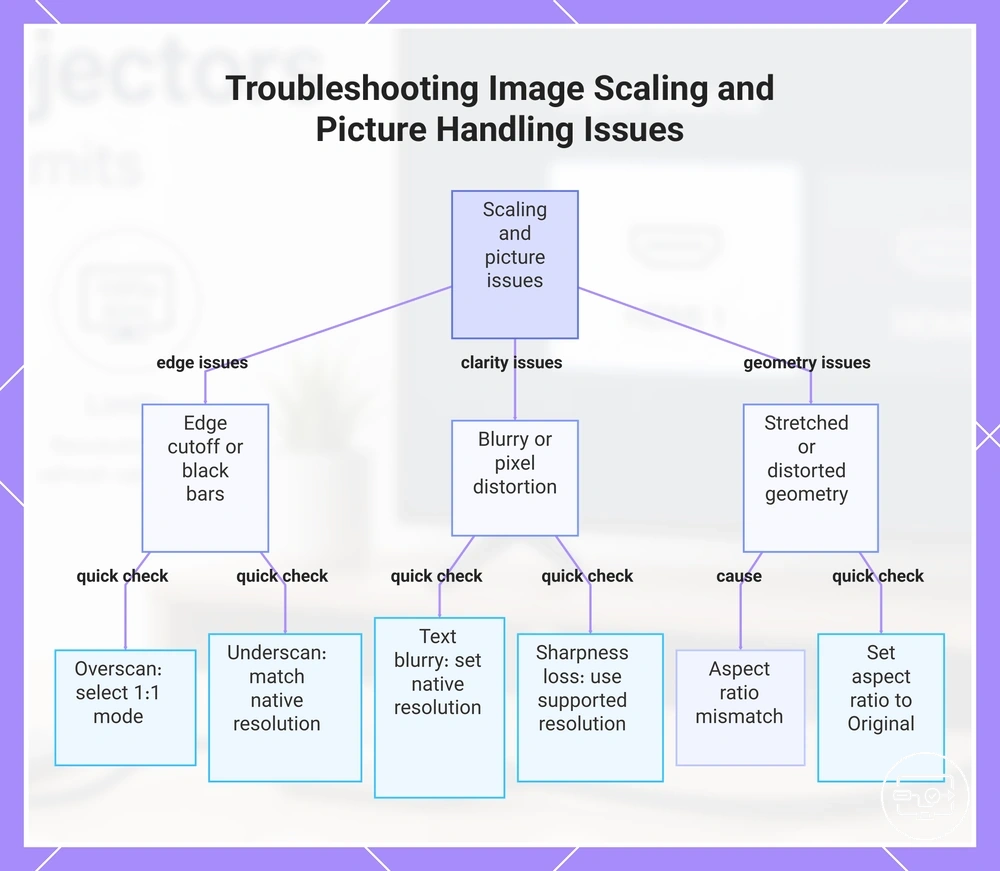
An image that appears cropped, soft, or distorted is usually a sign of a compatibility mismatch in how the source device handles overscan, scaling, or aspect ratio settings—not a faulty cable or port. The symptoms below map directly to their likely processing causes.
- Symptom: Content cut off at screen edges (text, icons, game HUD missing). Likely cause: Overscan enabled on the display or source device, zooming beyond the visible area. Quick check: Look for overscan, zoom, or screen fit settings in the display or source menus; select a 1:1 or just scan mode.
- Symptom: Black bars on sides or top/bottom (letterboxing or pillarboxing). Likely cause: Underscan or aspect ratio mismatch between source and display. Quick check: Verify source resolution matches the display’s native resolution; adjust underscan controls or aspect ratio menu.
- Symptom: Text and fine details blurry or soft, not pixel-sharp. Likely cause: Scaling active because source resolution does not match panel’s native pixel grid, forcing interpolation. Quick check: Set display output to recommended/native resolution; disable any scaling override in graphics driver.
- Symptom: Circles oval, faces stretched horizontally or squashed vertically. Likely cause: Display’s aspect ratio setting forcing a mismatch (e.g., 4:3 content stretched to 16:9 screen). Quick check: Locate aspect ratio control (often labeled Wide, Full, Original, Aspect) and choose option that preserves original ratio.
- Symptom: Image correctly framed but reduced sharpness or pixel distortion. Likely cause: Resolution and timing signals mismatched, causing scaler to reprocess image. Quick check: Ensure connected device sends a resolution and refresh rate the display supports natively; update graphics drivers if needed.
This chart maps common image display symptoms to their likely processing causes and quick checks for resolution.
Handshake and sync differences that affect reliability across displays
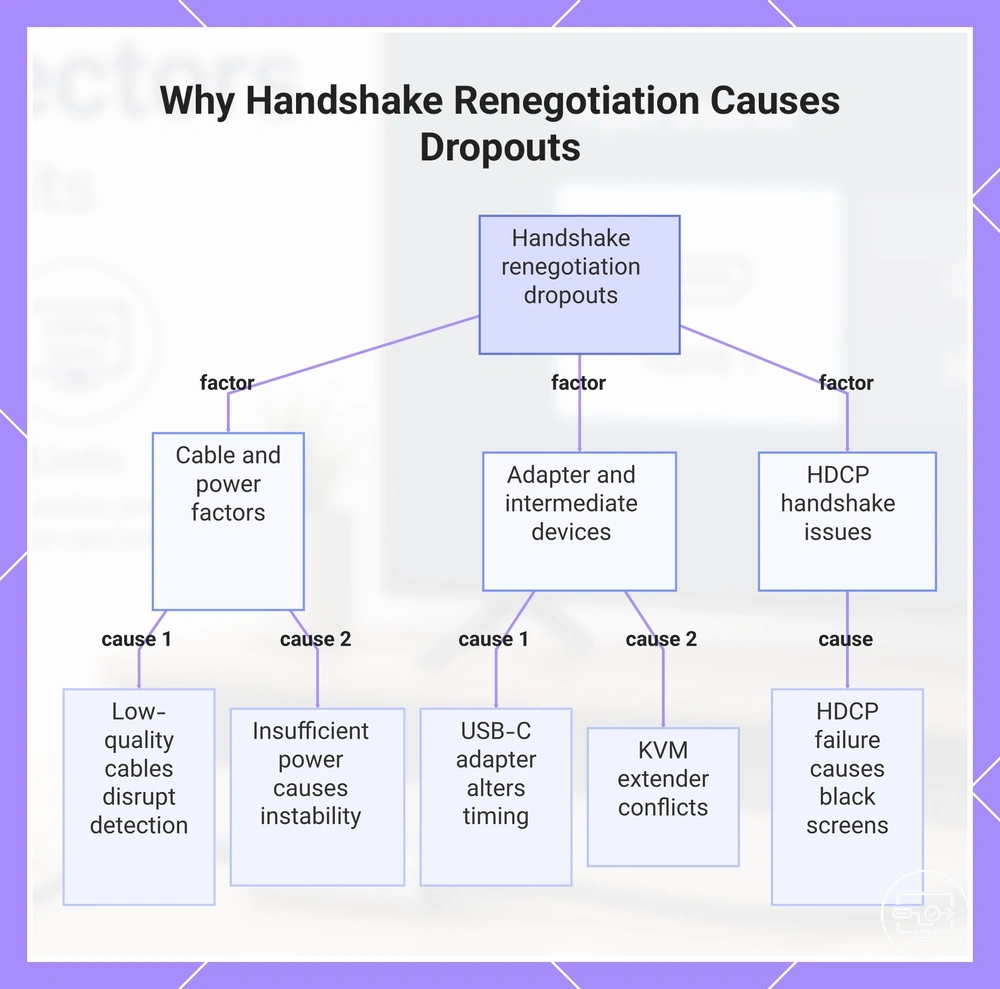
Handshake renegotiation between source and display often causes dropouts and intermittent detection, not a single fixed incompatibility. When a display disconnects and reconnects—due to a state change such as sleep, input switching, or cable reinsertion—the source and monitor must renegotiate signal parameters.
Common stability variables include:
- Cable quality and length – low-quality or damaged HDMI/USB-C cables can disrupt hot-plug detection and cause repeated renegotiation.
- Power supply – insufficient power to the display or intermediate adapter can lead to unstable handshake behavior.
- Adapter compatibility – USB-C to HDMI adapters may alter timing or forwarding of handshake data, introducing dropouts.
- Intermediate devices – KVMs, extenders, or switchers add their own negotiation state that can conflict with the source-display handshake.
- HDCP handshake – a separate cryptographic exchange that, if slow or failing, can produce black screens or flash even when the video handshake succeeds.
Identifying which variable most often coincides with the symptom helps pinpoint the weak link in the signal chain.
This chart shows the main factors that cause handshake renegotiation dropouts between source and display, helping identify the weak link in the signal chain.
Choosing the right adapter, cable, or hub for TV and projector connections
Choosing the right adapter, cable, or hub for a TV or projector depends on matching the source device’s output method with the display’s input acceptance. The goal is to select a chain where the device supports video output (typically via DisplayPort Alt Mode on USB-C), the adapter or cable converts to the correct signal type, and the TV or projector accepts that signal at the required resolution and refresh rate.
The following flowchart organizes the decision path from source output to display acceptance, helping you identify the right adapter category for your setup.
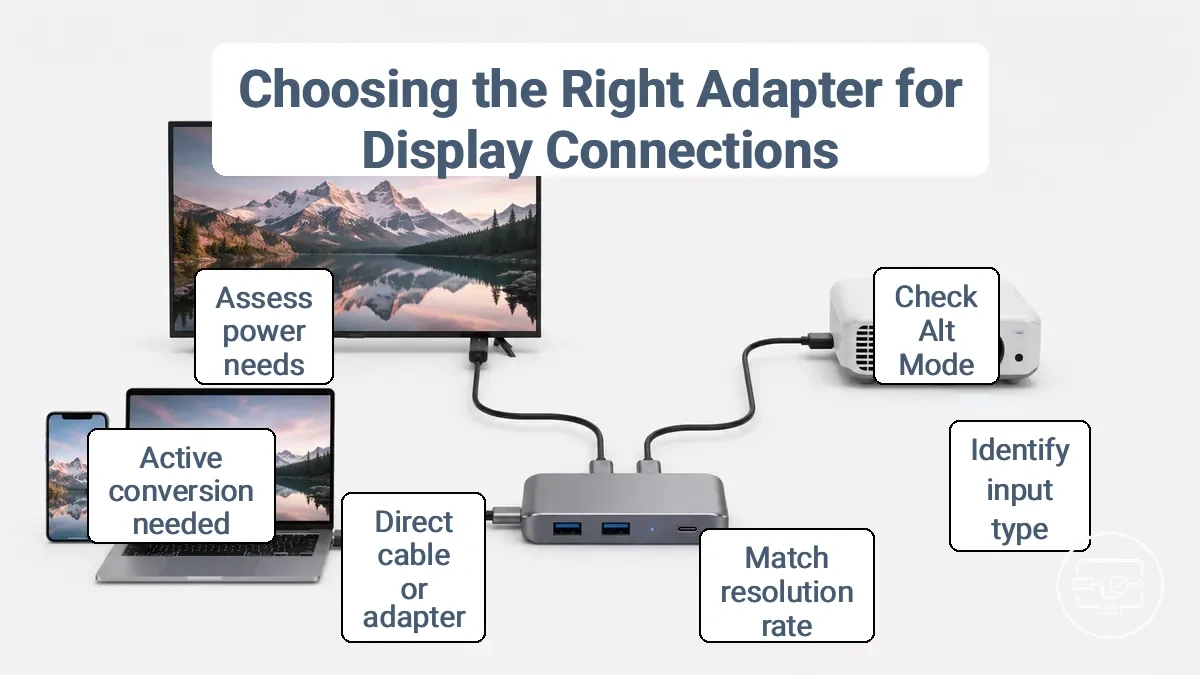
For example, connecting a phone to a TV often works with a simple USB-C to HDMI cable if the phone supports Alt Mode, while a laptop used with a projector may require a hub that also provides power delivery and additional ports for peripherals. The decision between a direct cable and a multiport hub depends on whether you need to charge the device, connect USB accessories, or use the projector’s audio output.
Use the following decision points to match your specific setup with the appropriate adapter category:
- Check if your source device’s USB-C port supports DisplayPort Alt Mode – this is typically required for video output over a simple cable.
- Identify the display’s input type: HDMI is common on modern TVs and projectors, while older units may have VGA or DVI.
- Match the resolution and refresh rate your display supports: standard 1080p60 works with most adapters, but 4K/60Hz typically requires an HDMI 2.0 cable or adapter. Consider stable output for longer cable runs or higher bandwidth demands.
- Decide between a direct cable (fewer connections, lower cost) and an adapter plus existing cable (more flexibility if you already own high-quality HDMI or DisplayPort cables).
- Determine if active conversion is needed: passive cables typically work for direct protocol transfers (USB-C to HDMI using Alt Mode), but connecting to VGA or DVI requires an active converter because those standards are not natively supported over Alt Mode.
- Assess power delivery requirements: if your device drains battery during use, choose a hub that can pass through charging to avoid interruption.
Verify compatibility before purchase. For a more detailed comparison between direct cables, adapters, and hubs, choose the right adapter or hub.
Active conversion vs Alt Mode passthrough and why some adapters work when others don’t
Alt Mode passthrough sends a native video signal without conversion and requires the source device to have video output via Alt Mode. Active conversion uses an internal chip to process the signal and is less dependent on device support.
When a device does not support video output via Alt Mode, an active converter may be necessary to generate a usable HDMI signal.
| Attribute | Alt Mode Passthrough | Active Conversion |
|---|---|---|
| How it works | Passes through native video signal. | Converts video signal via internal chip. |
| Required source capability | Source typically requires support for DisplayPort Alt Mode and dual-mode (DP++) to output an HDMI-compatible signal. | Source only needs a DisplayPort signal; Alt Mode or DP++ not required. |
| Typical compatibility range | Typically works only when source device has video output via USB-C and cable and display accept the signal. | Compatible with a broader range of sources, including devices that lack Alt Mode video support. |
| Failure mode when requirements not met | No video output; screen remains black or display not detected. | May produce no video, low resolution, or signal drop if the conversion chip or cable chain is incompatible with the display or bandwidth limits. |
Power, Cable Length, and Stability Factors That Affect Long Sessions
Longer or underpowered USB-C to HDMI cable chains tend to become unstable during extended use.
- Excessive cable length → can increase resistance and voltage drop, reducing power to the adapter and making dropouts more likely.
- High power draw through a thin or long cable → can generate heat inside the cable, raising the risk of thermal instability and signal degradation (sparkles).
- Inadequate adapter power handling → when the adapter cannot compensate for cable losses, the system may renegotiate or reset, causing brief blackouts during use.
- Poor cable shielding in long runs → allows electromagnetic interference to affect the signal, resulting in visual artifacts like sparkles on the display.
- Accumulated heat from resistance in the entire cable chain → can expand connectors and create intermittent contact, increasing the chance of dropouts over time.
Outcomes can vary depending on cable quality and the specific devices in the chain.
TV and projector input settings that commonly prevent a working picture
Wrong input settings on your TV or projector can prevent a working picture or force an incompatible display mode. These settings are often labeled differently by brand, which may result in a 'no signal' message, blank screen, or limited resolution.
See the setup steps and display selection for a complete connection routine, and ensure the input mode matches the desired resolution and HDR setting.
- Input source selection – Selecting the correct HDMI port determines which source is displayed. If the TV is set to the wrong input, no image appears.
- Picture mode – Modes like Game or Vivid may disable some picture adjustments, leaving settings grayed out or forced to a specific default.
- Aspect ratio and zoom settings (often labeled as Wide Zoom, Full, or Zoom) – Can cause incorrect scaling or cropping, especially with non‑standard content.
- Resolution and refresh rate – Unsupported input resolution may cause a black screen or error.
- HDMI signal format (often labeled as Enhanced or Standard) – Standard may limit bandwidth for 4K or HDR signals, resulting in no picture or limited resolution.
- Input label assignment – Some TVs apply different processing based on the input label (e.g., PC vs. AV). Changing the label can enable or disable certain features.
This chart shows the input settings on TVs and projectors that commonly prevent a working picture, grouped into source selection, display mode, and signal/resolution issues.
TV Input Mode Settings That Change Bandwidth and Recognition Behavior
TV input mode settings can affect the bandwidth available to the connected device and how the TV classifies the incoming signal. Common mode categories and their typical outcomes include:
- Standard (default) mode: Bandwidth is often limited, which may cap resolution to 4K 30Hz or require 4:2:0 chroma subsampling; HDR often still works but with reduced color depth. This can make text less sharp and motion less smooth at higher frame rates.
- Enhanced (high bandwidth) mode: Opens higher data rates and typically supports 4K 60Hz with full chroma (4:4:4) and high‑quality HDR, resulting in sharper text, richer color, and smoother video. If HDR is not working on a capable source, the input mode may still be set to Standard.
- PC‑like mode: The TV may recognize the signal as a computer input and may disable overscan, extra processing, and scaling. This can improve text clarity and sharpness but may change color calibration or disable some video enhancements.
- VRR/gaming mode: Bandwidth is allocated for variable refresh rate, so resolution or HDR may be reduced to maintain consistent frame timing. This reduces stutter in fast scenes but may limit HDR and peak luminance.
Projector input and signal settings that change sync and color handling
When a projector shows an image briefly then loses sync or displays wrong colors, the projector's own signal settings are often the cause. A mismatch between the HDMI mode and the incoming format can produce intermittent dropouts or distorted color. Checking these settings is a logical first step before assuming a cable or source problem.
Adjusting the projector's signal settings can stabilize the picture when the source output format does not match the projector's default expectation. The following checklist outlines the main setting categories and their typical effects on sync and color. Matching the projector's mode to the source's output format is the recommended approach.
- HDMI video range — Setting this to ‘Normal’ or ‘Expanded’ changes how the projector interprets black and white levels; a mismatch can cause crushed blacks or washed-out color.
- Input signal type — Choosing ‘RGB’ or ‘Component’ tells the projector how to decode color information; the wrong selection often leads to incorrect color or no sync.
- Resolution and refresh rate — Forcing a specific resolution or refresh rate may cause the projector to reject the signal if the source sends a format outside the accepted timing range, resulting in a blank screen or intermittent sync.
- Color space or HDR format — Manually selecting a color space or HDR mode that does not match the source can produce overly dark or oversaturated colors.
Resolution, Refresh Rate, HDR, and Color-Format Limits with TVs and Projectors
Performance limits when connecting a source via USB-C to HDMI depend on the bandwidth through the entire chain — resolution, refresh rate, HDR, and color format all share that capacity.
This diagram organizes these trade-offs by conditions, and the weakest link—whether the source port, the adapter, or the display input—often determines what combination works stably.
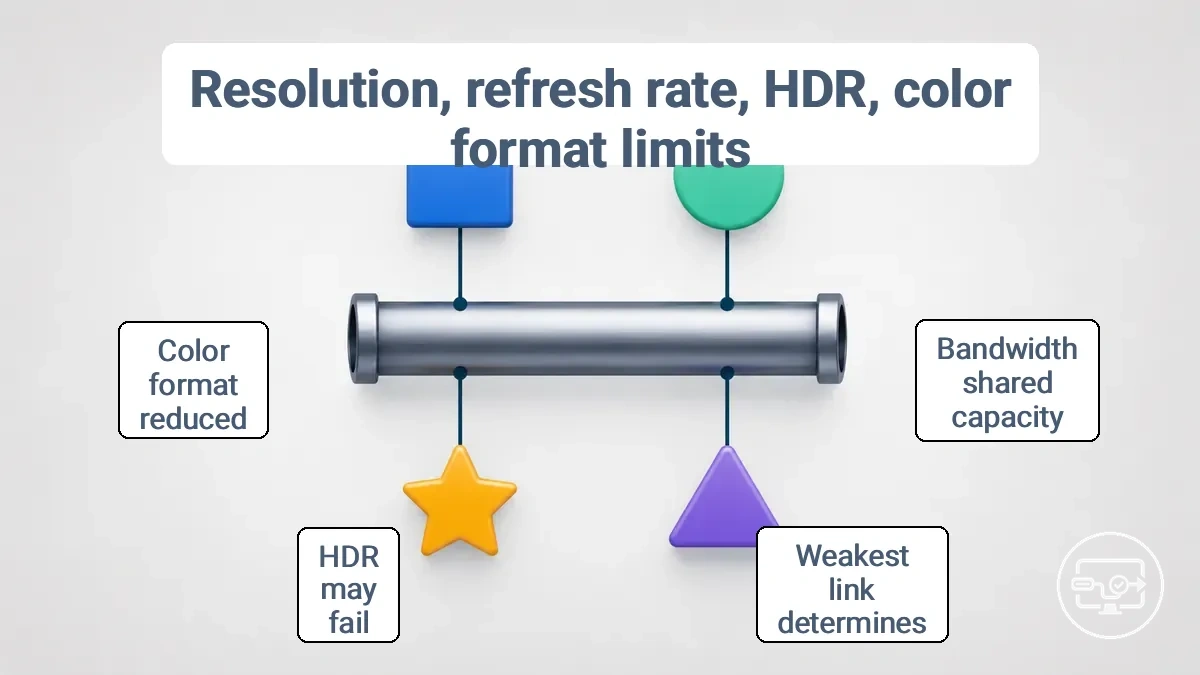
This table lists common combinations of resolution, refresh rate, HDR, and color format with their typical outcome on TVs and projectors.
| Resolution | Refresh Rate | HDR | Color Format | Typical Result |
|---|---|---|---|---|
| 4K | 60Hz | On (10-bit) | 4:2:0/4:2:2 | May work on high-bandwidth chains; HDR may fail or require reduced color depth on others. |
| 4K | 60Hz | Off (8-bit) | 4:4:4 | Works in most cases. |
| 4K | 30Hz | On | 4:2:2 | Often works, but at a lower refresh rate. |
| 1080p | 120Hz | On | 4:2:2 | May require reduced color format to maintain stability. |
| 4K | 120Hz | On | 4:2:0 | Typically limited by adapter or cable; may cause dropouts or no signal. |
For example, 4K at 60Hz with HDR may work on one setup but force a switch to 4K at 60Hz without HDR on another, depending on the adapter and cable. Some combinations that support 4K may only do so at a reduced refresh rate or with a narrower color format, even when the display itself is capable of higher performance.
Why 4K can work while HDR fails on some TV or projector setups
HDR can fail on a TV or projector setup even when 4K output works because HDR requires additional device negotiation, sufficient bandwidth, and correct input mode alignment. A 4K signal at SDR levels often passes through connections that lack the format handshake or data rate needed for HDR metadata.
The following criteria outline these conditions and highlight the need to verify HDR support and input mode alignment.
- HDR mode enabled on source: The source must output HDR in a compatible format; otherwise, HDR may not activate or may be unstable.
- Input mode and display negotiation: Even if 4K passes, the display may not report HDR capability via EDID; when the handshake fails, the source may fall back to SDR or show washed-out colors.
- Adapter or converter support: When using a USB-C to HDMI adapter, the adapter must support HDR pass-through; many handle 4K30 but not 4K60 HDR bandwidth, causing flickering or no HDR.
- Cable condition and length: Longer or lower-rated HDMI cables can degrade the signal enough to drop the HDR metadata while still carrying the resolution, creating a scenario where 4K appears but HDR does not.
Overscan, underscan, and soft image issues caused by scaling and timing mismatch
Overscan (cropped edges), underscan (black borders), and soft image (blur) are typically caused by a scaling and timing mismatch rather than a connection failure. Symptom-level clues help identify whether the mismatch involves timing, scaling, or pixel mapping.
- Cropped edges (overscan) – Check the display's aspect ratio or picture size setting. Likely cause: the display applies a zoom or overscan mode instead of a 1:1 pixel map.
- Black borders (underscan) – Check the device's output resolution and underscan adjustment. Likely cause: the output resolution is lower than the display's native panel, or the display compensates with underscan.
- Soft or blurry image – Check the resolution setting and whether the display is set to its native resolution. Likely cause: the GPU or display scales a non-native resolution, softening the image.
- Partial fill without cropping – Check the display's pixel mapping or 'just scan' mode. Likely cause: the display rescales the signal because it is not set to a pixel-perfect mode.
- Intermittent borders when switching inputs – Check whether the display applies different scaling rules per input. Likely cause: the display's auto-scaler defaults to a different aspect ratio or zoom level for each HDMI input.
HDCP and protected-content limits on TVs and projectors
HDCP (High-bandwidth Digital Content Protection) governs playback of protected content like streaming video. Standard desktop output often works without HDCP handshaking, so your TV or projector may show the UI but fail when you start a Netflix or Disney+ stream. The black screen occurs because the entire chain—source, adapter, cable, and display—must complete HDCP negotiation for protected content to play.
This checklist separates conditions that work for desktop output from those required for protected streaming, and helps identify which component may not be passing HDCP.
- Check that the adapter (USB‑C to HDMI or similar) and cable are HDCP‑compatible. Not all adapters pass the HDCP handshake correctly, especially older or budget models.
- Confirm the TV or projector supports HDCP on the input you are using. Most modern displays do, but the setting may be toggled off or the input may be set to a non‑HDCP mode.
- Verify the source device’s HDCP setting (e.g., on game consoles or streaming sticks) is enabled. Some devices allow you to disable HDCP for capture, which can prevent protected playback.
- If you use a hub, splitter, or repeater, ensure it passes HDCP. Intermediate devices that do not support HDCP or use an incompatible version can break the negotiation.
- App and OS behaviour varies. For example, a streaming app may require a higher HDCP version than the one your display supports, potentially leading to a downgraded resolution or black screen while other apps play fine.
A common scenario: the desktop appears on the projector, but a streaming service shows a black screen—this points to an HDCP negotiation failure rather than a signal issue. Evaluate each link in the chain individually, starting with the adapter and cable, as the weakest HDCP support determines if protected content plays or fails.
This chart shows the key diagnostic sign and common checkpoints for HDCP negotiation failure when protected content fails to play while desktop output works.
When streaming apps show a black screen despite a working desktop signal
When a streaming app shows a black screen while the desktop signal is still visible, the cause is often a protected-content negotiation failure rather than a broken HDMI link.
The desktop works because unprotected content passes through the display chain without triggering HDCP checks, while streaming apps need a successful HDCP handshake to play protected content. When the handshake fails, the video layer stays black even though audio may play and the monitor still shows other elements.
Check each link in the playback chain for HDCP compliance. Simplifying the chain to a direct source-to-monitor connection is often the most reliable test for HDCP negotiation issues.
- Check the HDMI cable and port: a cable that passes a desktop signal may still fail HDCP compliance, especially if it's older or damaged.
- Check the HDMI adapter or dock: USB-C to HDMI adapters and docks add extra HDCP negotiation steps; removing the adapter often resolves the black screen.
- Check the display's HDCP version: if it does not support the version required by the streaming app, protected content may not render.
- Check for other display chain components: splitters, switches, or extenders often don't relay HDCP properly.
- Check the source device's HDCP status: some devices can fall back to a lower HDCP version after a restart or power cycle.
What to Check in the Adapter Chain When HDCP Negotiation Fails
When HDCP negotiation fails, isolate the weak link in the adapter chain. The checks start with quick resets and progress to more focused component tests.
- Power cycle the chain (display first, then hub/adapter, then source). If protected content plays, a stalled handshake likely reset on reboot.
- Connect source directly to display with a single HDMI cable, bypassing all adapters and hubs. If black screen disappears, the adapter chain likely contains the failing component.
- Replace the HDMI cable between source and first adapter/hub. A marginal cable can pass desktop video but fail HDCP authentication, causing black screen only with protected content.
- Add adapters back one at a time, testing protected content after each. The component that reintroduces black screen is likely interfering with HDCP negotiation.
- Check HDCP version of each adapter, hub, and display. If source requires HDCP 2.2 for 4K but an adapter only supports HDCP 1.4, the chain may not authenticate.
- Remove capture card or HDMI splitter and test again. These devices often trigger HDCP protection, preventing playback even if the chain is compliant.
- Test with a display known to work with HDCP-protected content. If black screen persists, the display may have limited HDCP support or a version mismatch.
Audio Behavior and Sound Output Expectations Over USB-C to HDMI
Audio over USB-C to HDMI may depend on the output device selected in system settings and the audio formats both the source and display support. When the correct HDMI output is chosen and both devices handle a compatible audio format, sound plays through the TV or projector speakers. Incorrect output selection or format limits often prevent audio even when video works.
The table groups common audio outcomes by source output selection, HDMI negotiation, and display routing.
| Source Output Selection | HDMI Audio Negotiation | Display Support & Routing | Audio Effect |
|---|---|---|---|
| Correct HDMI output selected | Device supports common formats (stereo, 5.1) | TV or projector accepts HDMI audio | Sound plays |
| Internal speakers or wrong device selected | Audio not sent to HDMI | Display receives no audio signal | No sound from display |
| HDMI output selected, but device lacks audio over USB-C | Audio not transmitted over USB-C | Display receives video only | Silent |
| HDMI output selected, formats supported | Display cannot decode format (e.g., limited codec support) | Audio may be silent or fallback to basic stereo | Possible no audio |
A common scenario is picture on the TV or projector but no sound. This often points to a routing or format mismatch rather than hardware failure. A logical first step is checking system sound settings and making sure the HDMI output device is set as the default audio playback device.
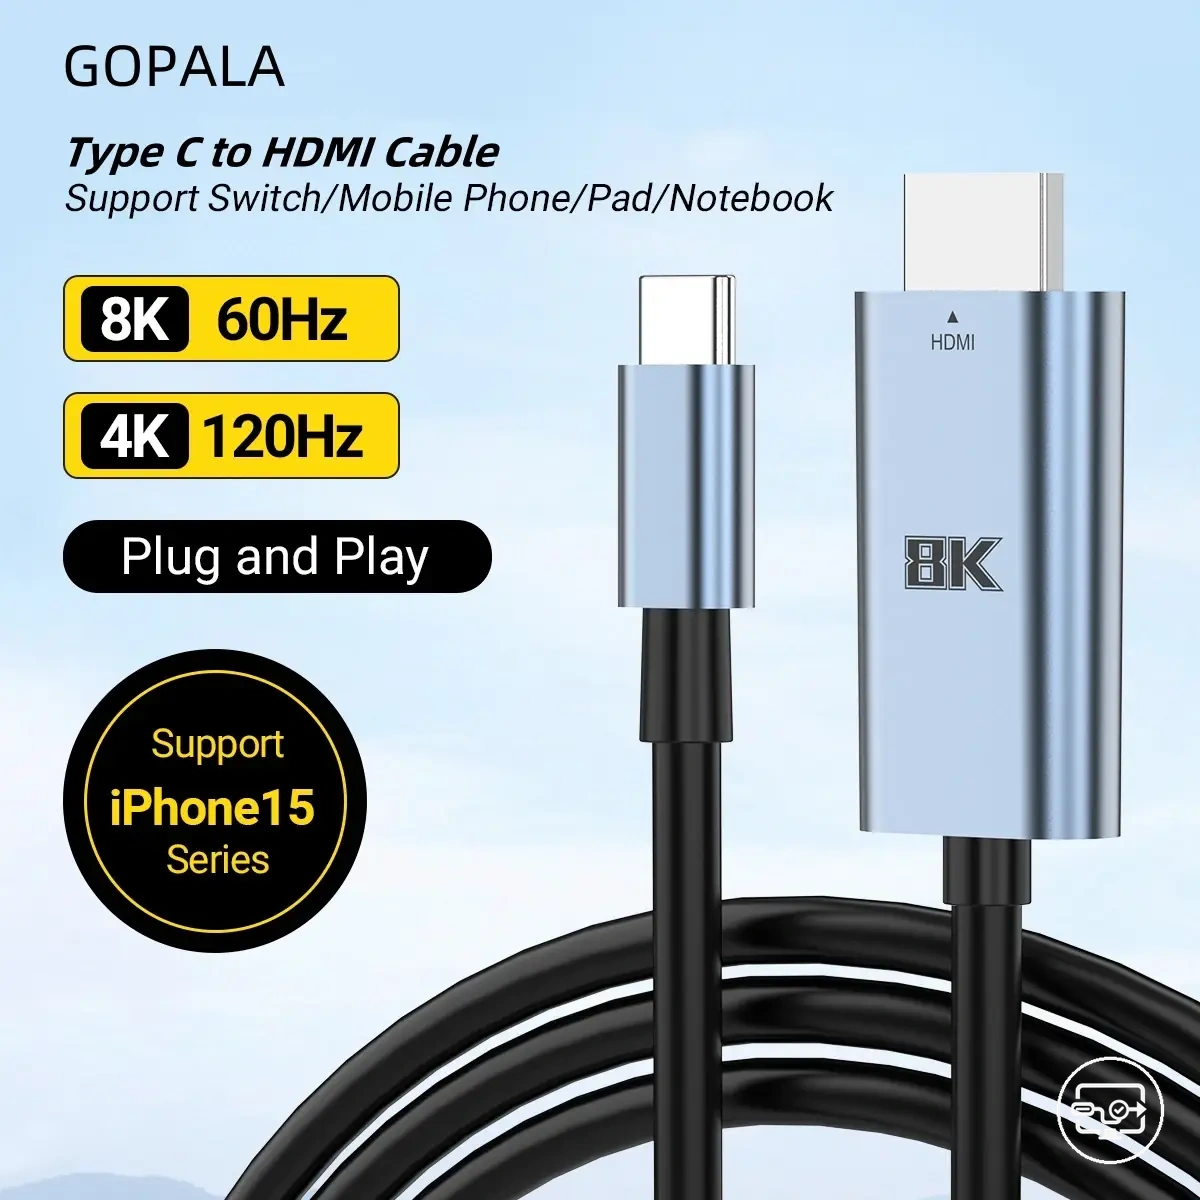
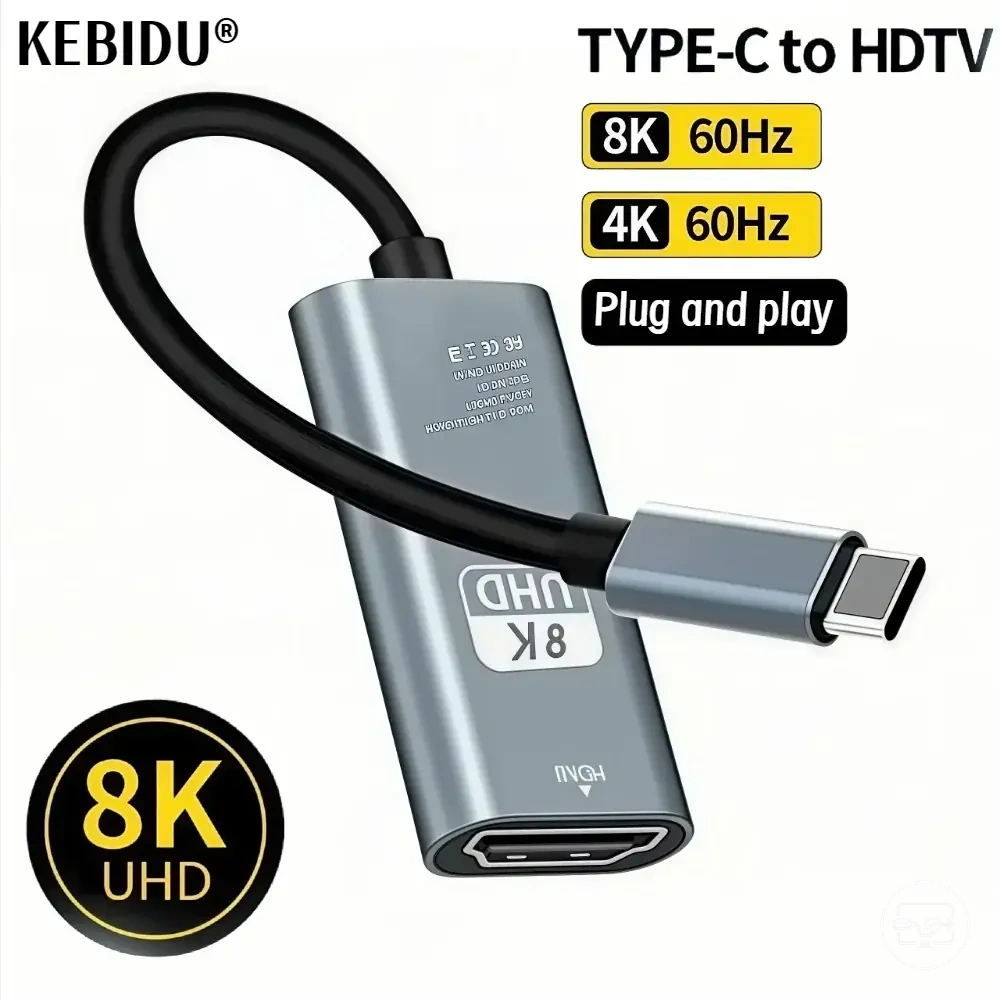
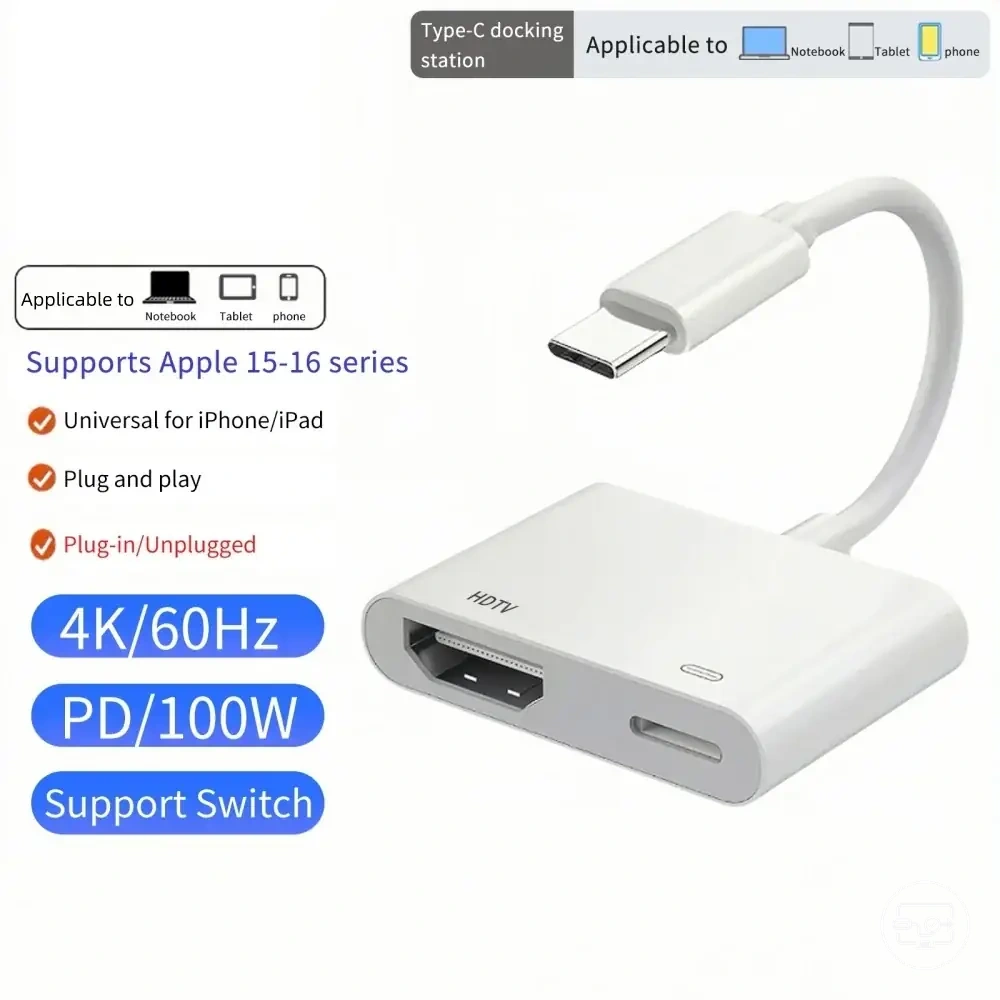
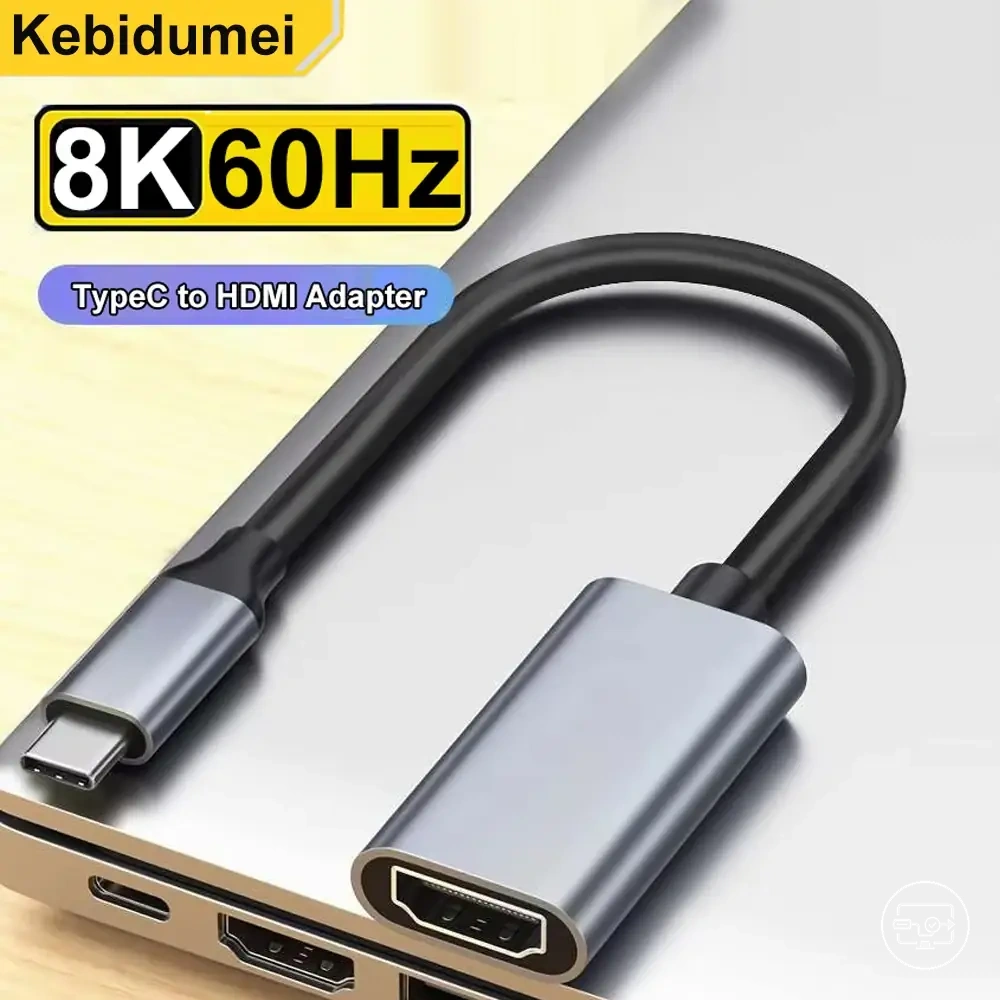
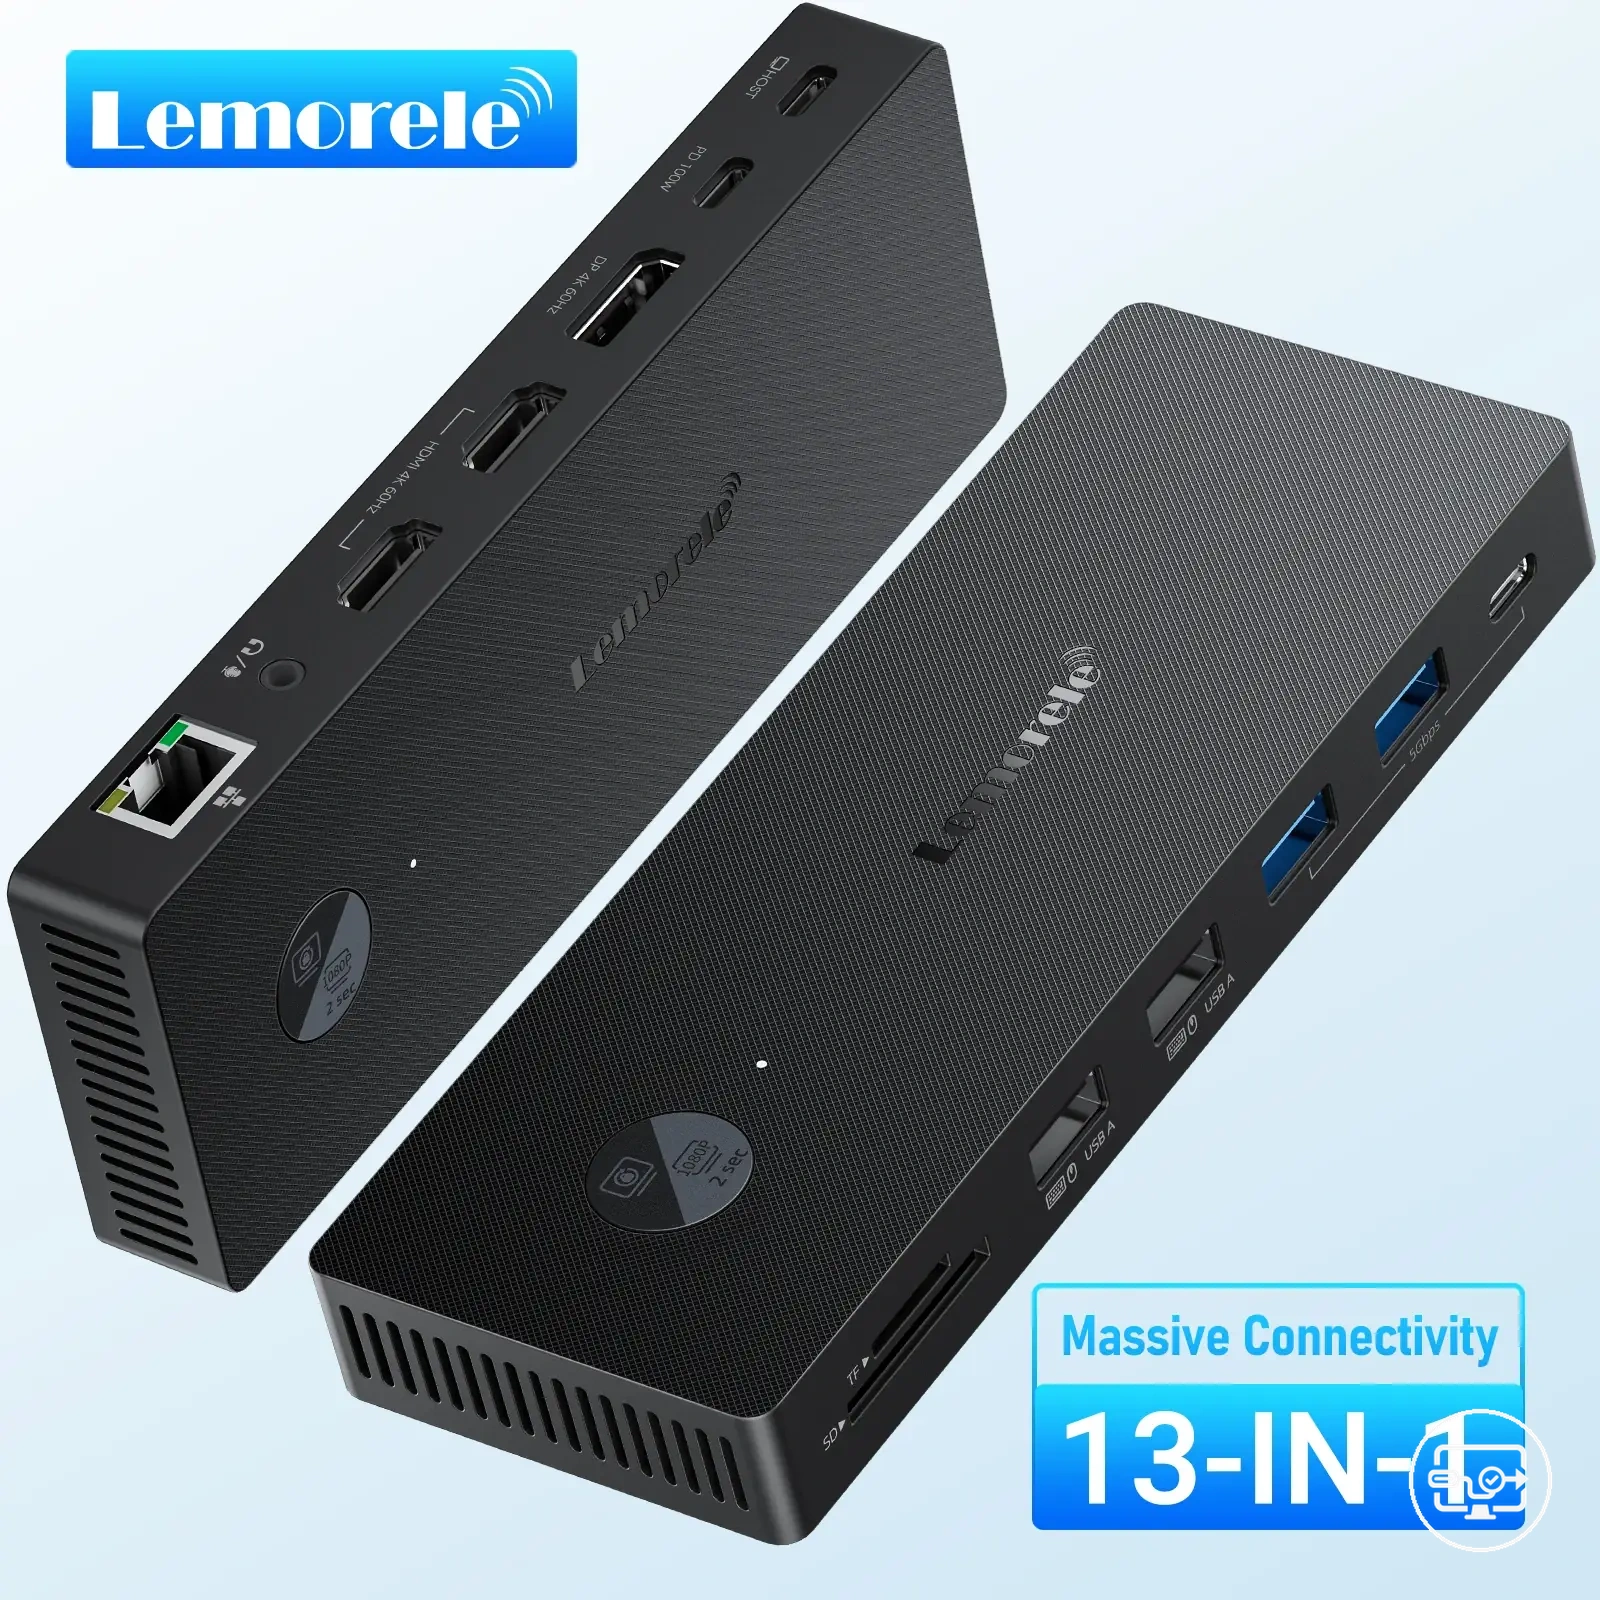
The products below are useful examples for comparing available options. Before buying, check that the compatibility criteria, key features, and product details match your needs.
TV audio output limits and settings that control whether sound plays
TV audio behavior depends on the selected audio output path and the supported audio format.
- Audio Output selection – sends sound to TV speakers or an external device; if the output does not match the connected speakers, audio may remain silent.
- Audio Format setting (PCM vs. Bitstream) – a mismatch between the TV’s format and the source or external speaker may cause distortion or silence.
- HDMI Input Audio Format – configuring the input for multichannel or stereo affects compatibility with game consoles and streaming devices; an incorrect setting may mute the audio.
- Digital Output Audio Format – choosing Dolby Digital or PCM for optical or HDMI ARC affects how audio is sent; an incompatible setting may result in silence.
Projector Audio Constraints and When External Audio Routing Is Required
Projector built-in speakers are often limited in power and frequency response, suitable mainly for small rooms or basic content. For larger spaces or cinematic content, external routing via HDMI, Bluetooth, or 3.5 mm output may be required.
- Built-in speakers: present in many projectors but typically low-powered and with shallow bass, usable only for casual viewing or voice clarity in small rooms.
- Audio output options (3.5 mm jack, Bluetooth, HDMI ARC): provide a routing path to external speakers or sound systems, allowing usable audio for movies and games.
- Ceiling-mounted or rear-placed projectors: even with speakers present, sound may be directed away from viewers; external speakers placed near the screen can be a more practical choice for clear audio.
- Home theater projectors: many omit high-quality built-in speakers entirely, so usable audio requires a dedicated sound system.
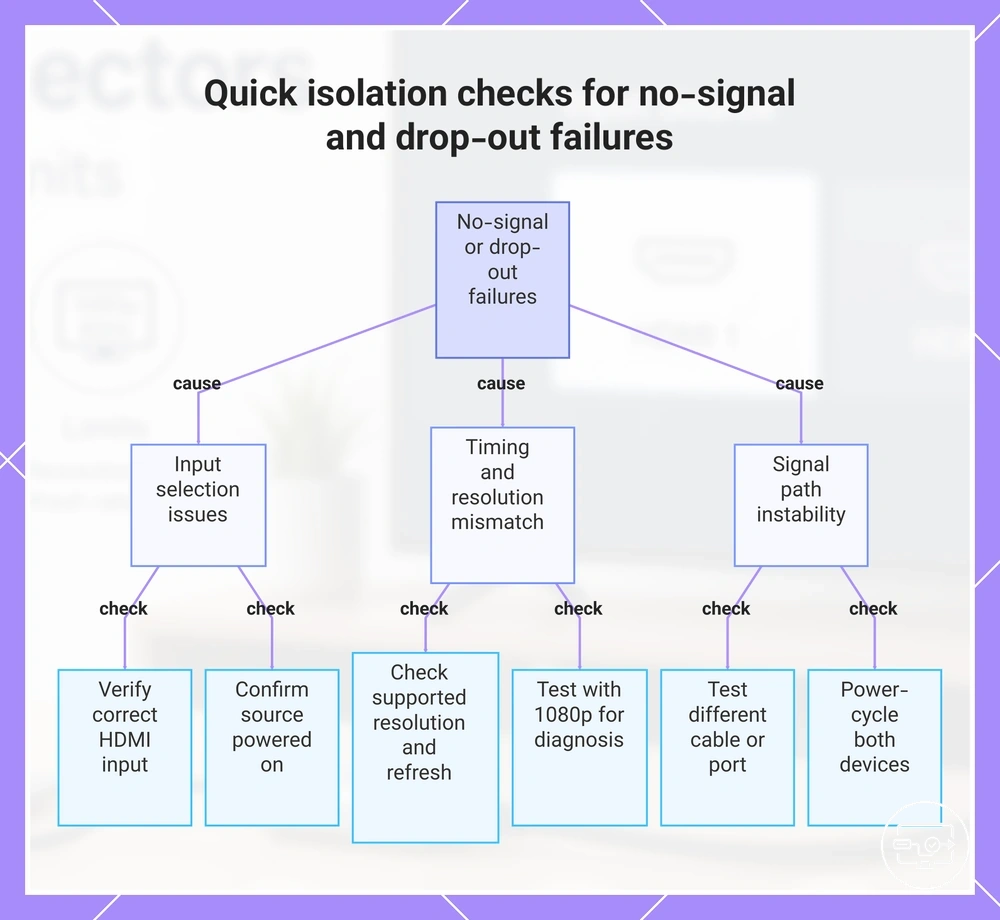
No-signal and drop-out failures: quick isolation checks specific to TVs and projectors
No signal or dropouts on a TV or projector usually stem from incorrect input selection, unsupported resolution or refresh rate, cable or power instability, or HDMI handshake failure. Isolate the failing layer first.
Displays use EDID negotiation and signal timing, so mismatches can cause black screen or intermittent loss. For broader signal failures, see symptom troubleshooting routes. These ordered checks isolate whether the issue is with the display or the source without replacing hardware.
Run these checks in order. Each isolates whether the issue is input selection, timing, cable stability, or handshake.
- Verify the display is set to the correct HDMI input.
- Confirm the source device is powered on and actively sending video.
- Check that the source resolution and refresh rate are supported by the display (many displays accept 1080p at 60 Hz).
- Test with a different HDMI cable, especially if the current one is long or unshielded.
- Power-cycle both devices: turn off the source and display, then turn the source on first, followed by the display.
- Try a different HDMI port on the display or source.
For example, black screen only with a 4K source suggests unsupported resolution. Testing with 1080p confirms or rules it out. If none of these steps isolate the layer, move to symptom-specific diagnosis for deeper isolation.
The products below are useful examples for comparing available options. Before buying, check that the compatibility criteria, key features, and product details match your needs.
This chart shows the three main cause categories and the specific checks to isolate whether the issue is with the display or the source device.
Common causes of “No Signal” tied to input selection, power, and unsupported timings
A ‘no signal’ message usually means the display is on but not receiving a valid video signal, often due to a handshake mismatch rather than hardware failure. Common triggers fall into overlapping categories: input selection, power or cable issues, and unsupported resolution or timing.
- Input source mismatch: When the display’s input mode (e.g., HDMI 1, VGA) does not match the active device port, the screen often remains black and shows ‘no signal’. This suggests the source is sending a signal but the display is listening on the wrong channel.
- Power instability or hub/adapter issues: A device powered through a hub or adapter with insufficient voltage may intermittently lose detection, causing the display to flash a ‘no signal’ warning. This suggests the source is not maintaining a stable connection due to power delivery.
- Faulty or loose cable: A damaged HDMI cable or loose connection can prevent the signal from reaching the display, resulting in a persistent or flickering ‘no signal’. This suggests the physical link is broken or degraded.
- Unsupported resolution or timing: If the source outputs a resolution or refresh rate the display cannot handle (e.g., 4K on a 1080p-only projector), the display often shows a black screen with the ‘no signal’ message. This suggests the video format is outside the display’s accepted range.
- Source device turned off or in sleep mode: When the connected device is not actively outputting video, the display may see no signal even if cables and input are correct. This suggests the source needs to be powered on and awake.
Minimal cross-check steps to isolate whether the limitation is source, adapter, or display
Simplify the chain and test one variable at a time — no specialized tools required. The aim is to isolate, not to fully repair.
- Isolate the display: simplify the chain by connecting the source directly to the display, bypassing the adapter. If the display shows a signal, the adapter may be the cause of the limitation.
- Isolate the source: test it with a different display. A working image on the alternate display suggests the original display or its configuration may be limiting.
- Isolate the adapter: use it with a different source and display combination. If the adapter works in another chain, the original source or display may be the limitation.
- Test with a different cable: swap it if the cable is in the chain and observe any change to isolate whether it is the cause.
- Isolate the display input: if the display has multiple inputs, test each — compatibility may differ.